Breakout: D to the Wall
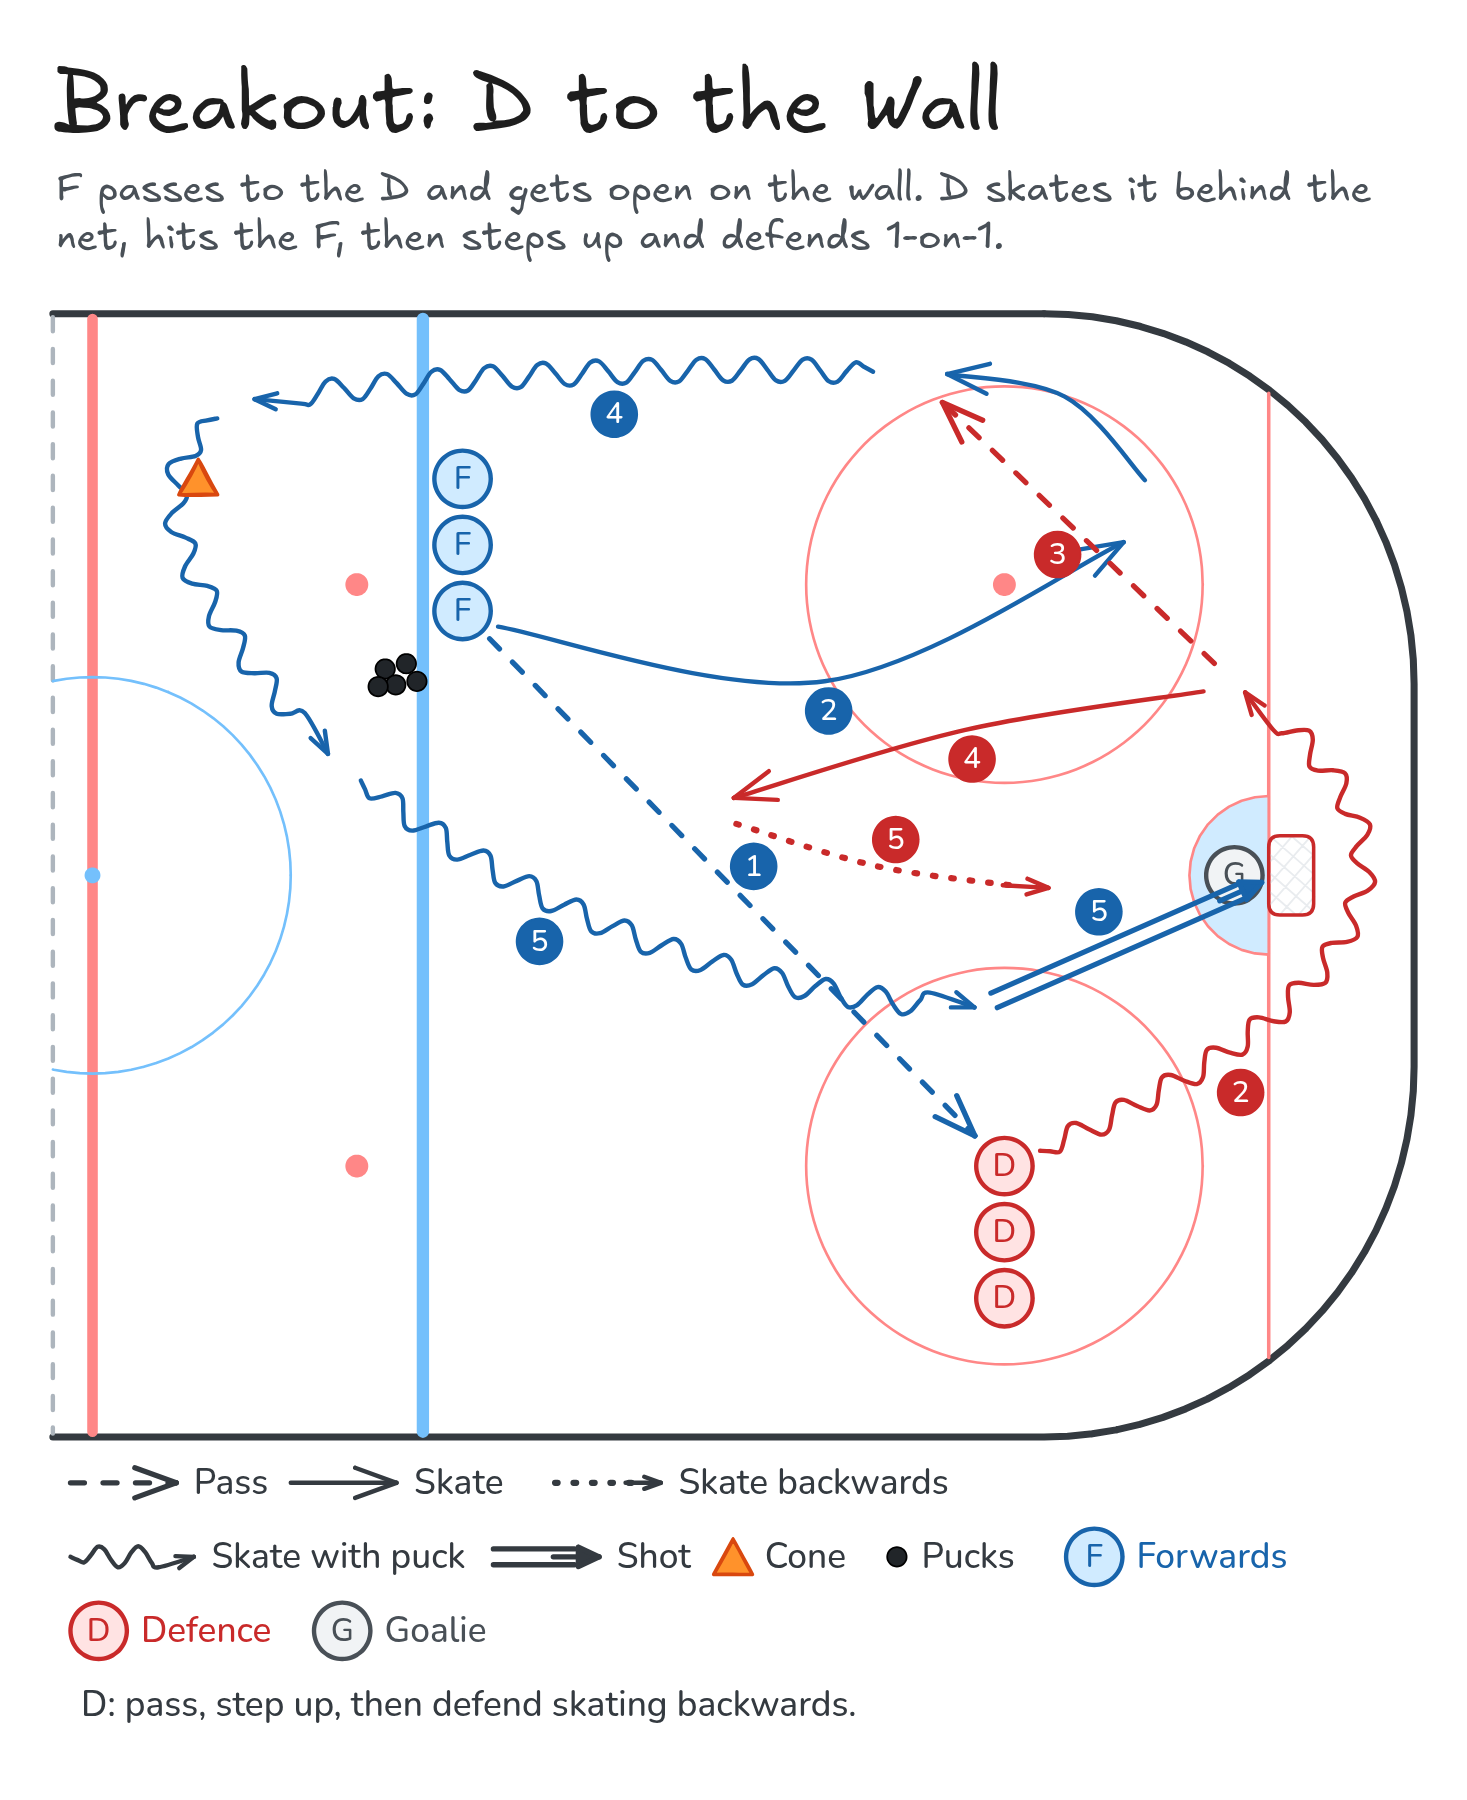
F passes to the D and gets open on the wall. D skates it behind the net, hits the F, then steps up and defends 1-on-1.
- Half ice
- Breakout
- Passing
- Defence
Watch
Diagram
Coaching points
- F: pivot to face the puck and keep your eyes on the D while you get open.
- F: stop on the wall with your stick on the ice. Give a target.
- D: look over your shoulder before you go behind the net, and move the puck quickly.
- D: after the pass, step up fast, then pivot and skate backwards. Stay between the F and the net.
- Catch it and go: feet moving up the wall right away, then attack with speed.
How it runs
- Forwards line up on the blue line with pucks. The D going steps out to the faceoff dot; the other D wait behind.
- The F passes to the D on the dot.
- The D skates the puck behind the net. At the same time the F loops low and opens up on the half-wall.
- The D passes to the F on the wall.
- The F carries up the wall and curls at the cone near the red line. The D steps up toward the blue line.
- 1-on-1: the F attacks the net and shoots. The D skates backwards and stays between the F and the net. Both go to the back of their lines.
- Variation: see D-to-Wall Breakout to 2-on-1. A centre swings with the winger and they attack 2-on-1 against the D.
Downloads
Open the Excalidraw file in Excalidraw to change the diagram.