Controlled-Skating Breakout
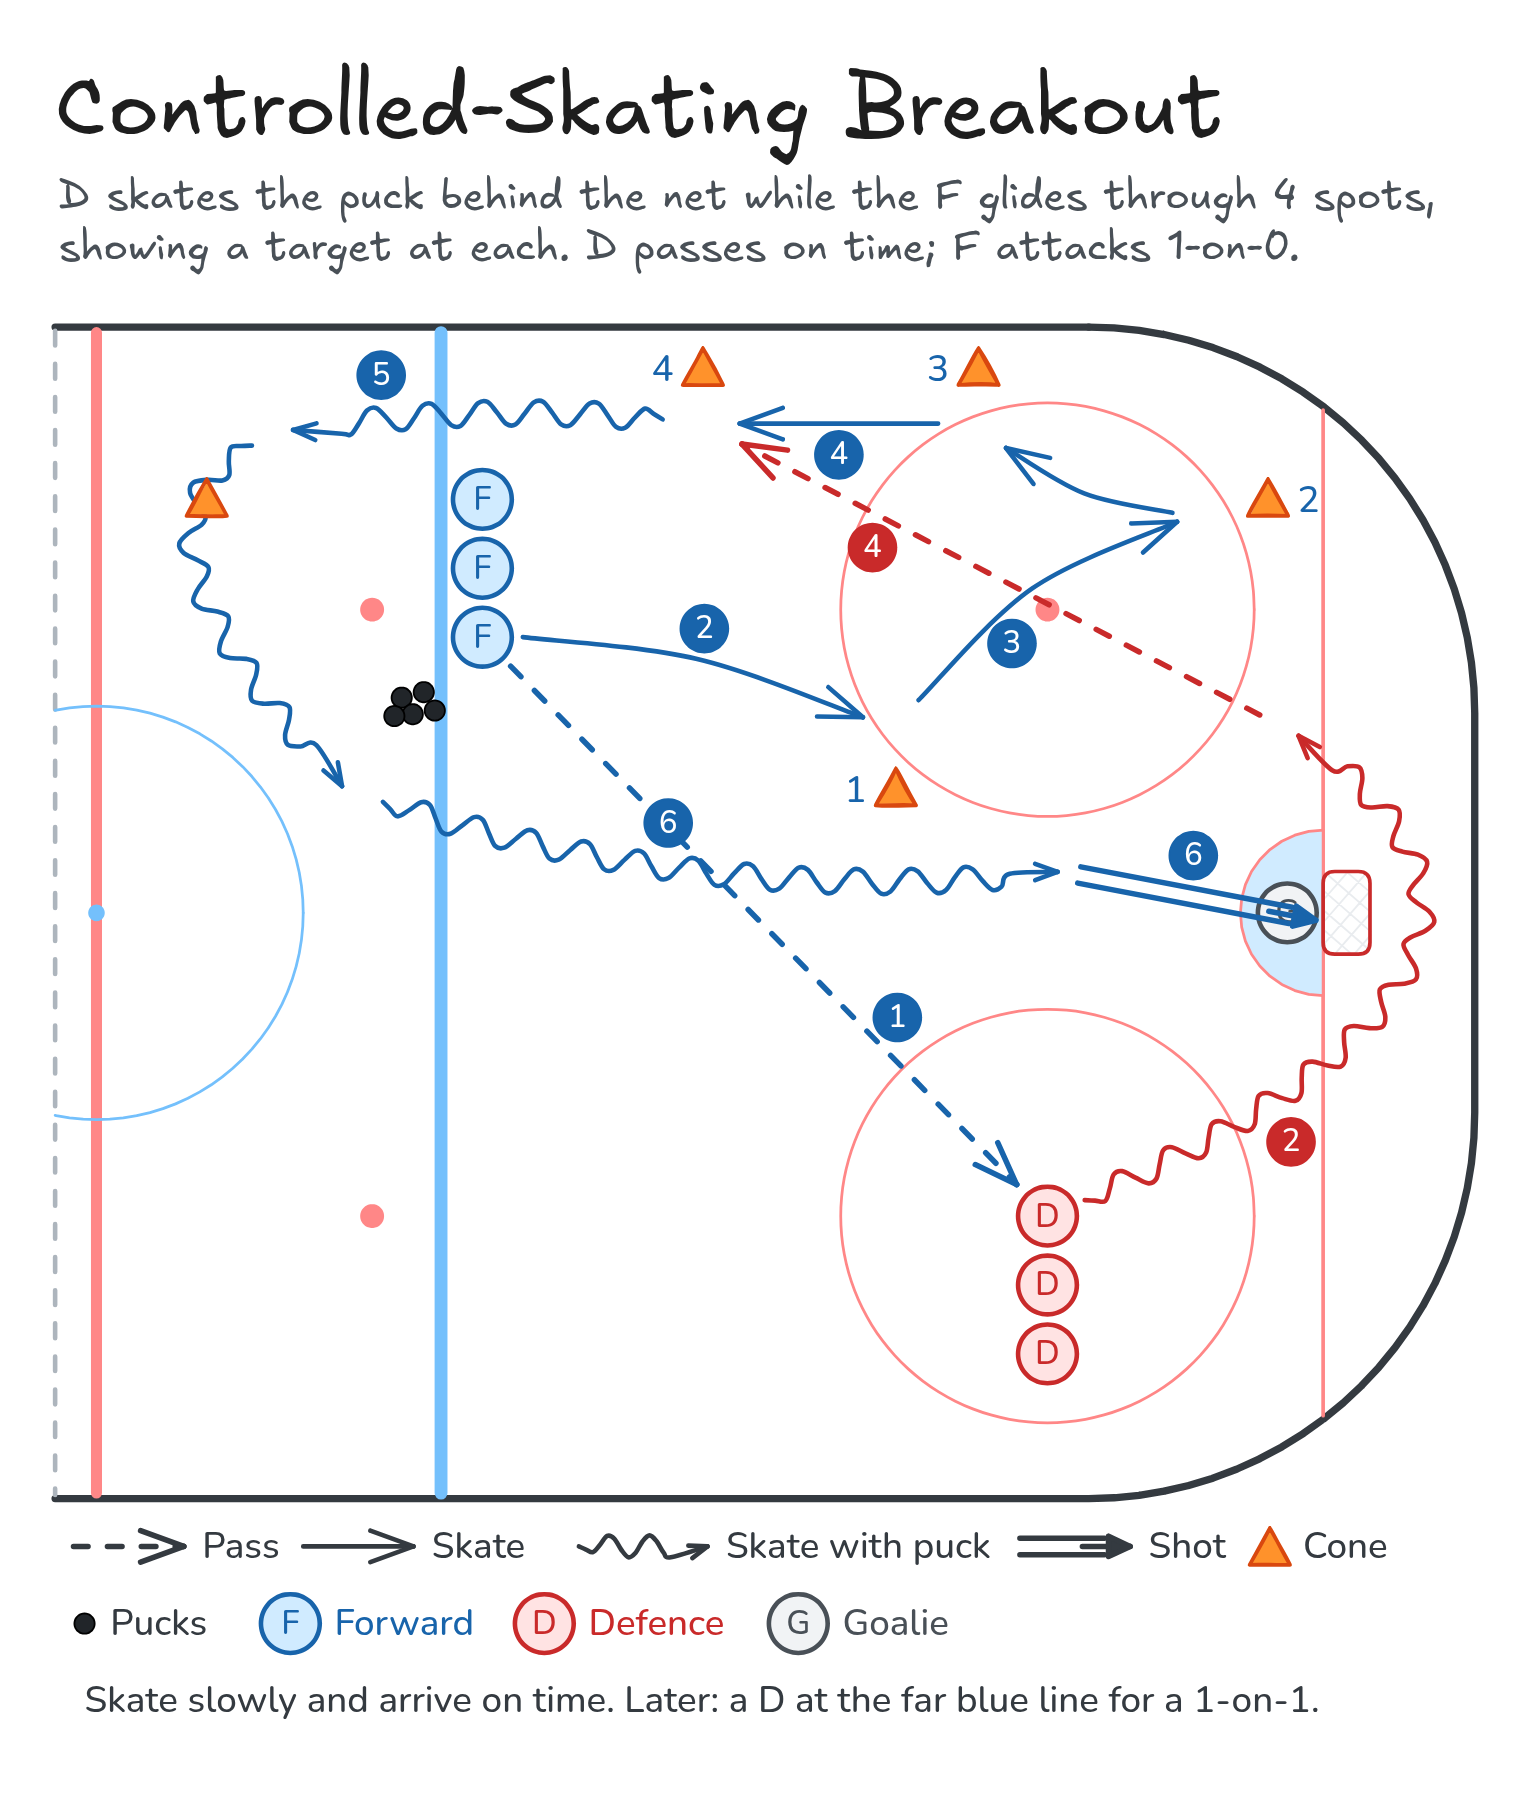
D skates the puck behind the net while the F glides through 4 spots, showing a target at each. D passes on time; F attacks 1-on-0.
- Half ice
- Breakout
- Passing
Watch
Diagram
Coaching points
- Control skate: slow and smooth, arriving at each spot on time.
- Show a target at every spot: stick on the ice, blade facing the puck.
- Never take your eyes off the puck.
- D: pass when the F is ready, not before. Hard and flat to the forehand.
- After the catch, attack with speed and shoot to score.
How it runs
- Forwards line up at the blue line, D at the faceoff dot. Place four cones as receiving spots: high slot, low by the boards, half-wall, and high on the wall.
- The F passes to the D, who pivots toward the boards and skates the puck behind the net.
- The F skates slowly through spots 1, 2 and 3, showing a target at each.
- The F arrives at spot 4 and the D passes on time.
- The F carries out, curls at the cone near the red line and attacks 1-on-0.
- Option: the coach calls which spot gets the pass. Later, add a D at the far blue line for a 1-on-1.
Downloads
Open the Excalidraw file in Excalidraw to change the diagram.