Olympic Breakout to 2-on-1
3-on-0 breakout to the blue line, tight turn around the cone, then back in 2-on-1 against the same D.
- Half ice
- Breakout
- Passing
- Shooting
Watch
Diagram
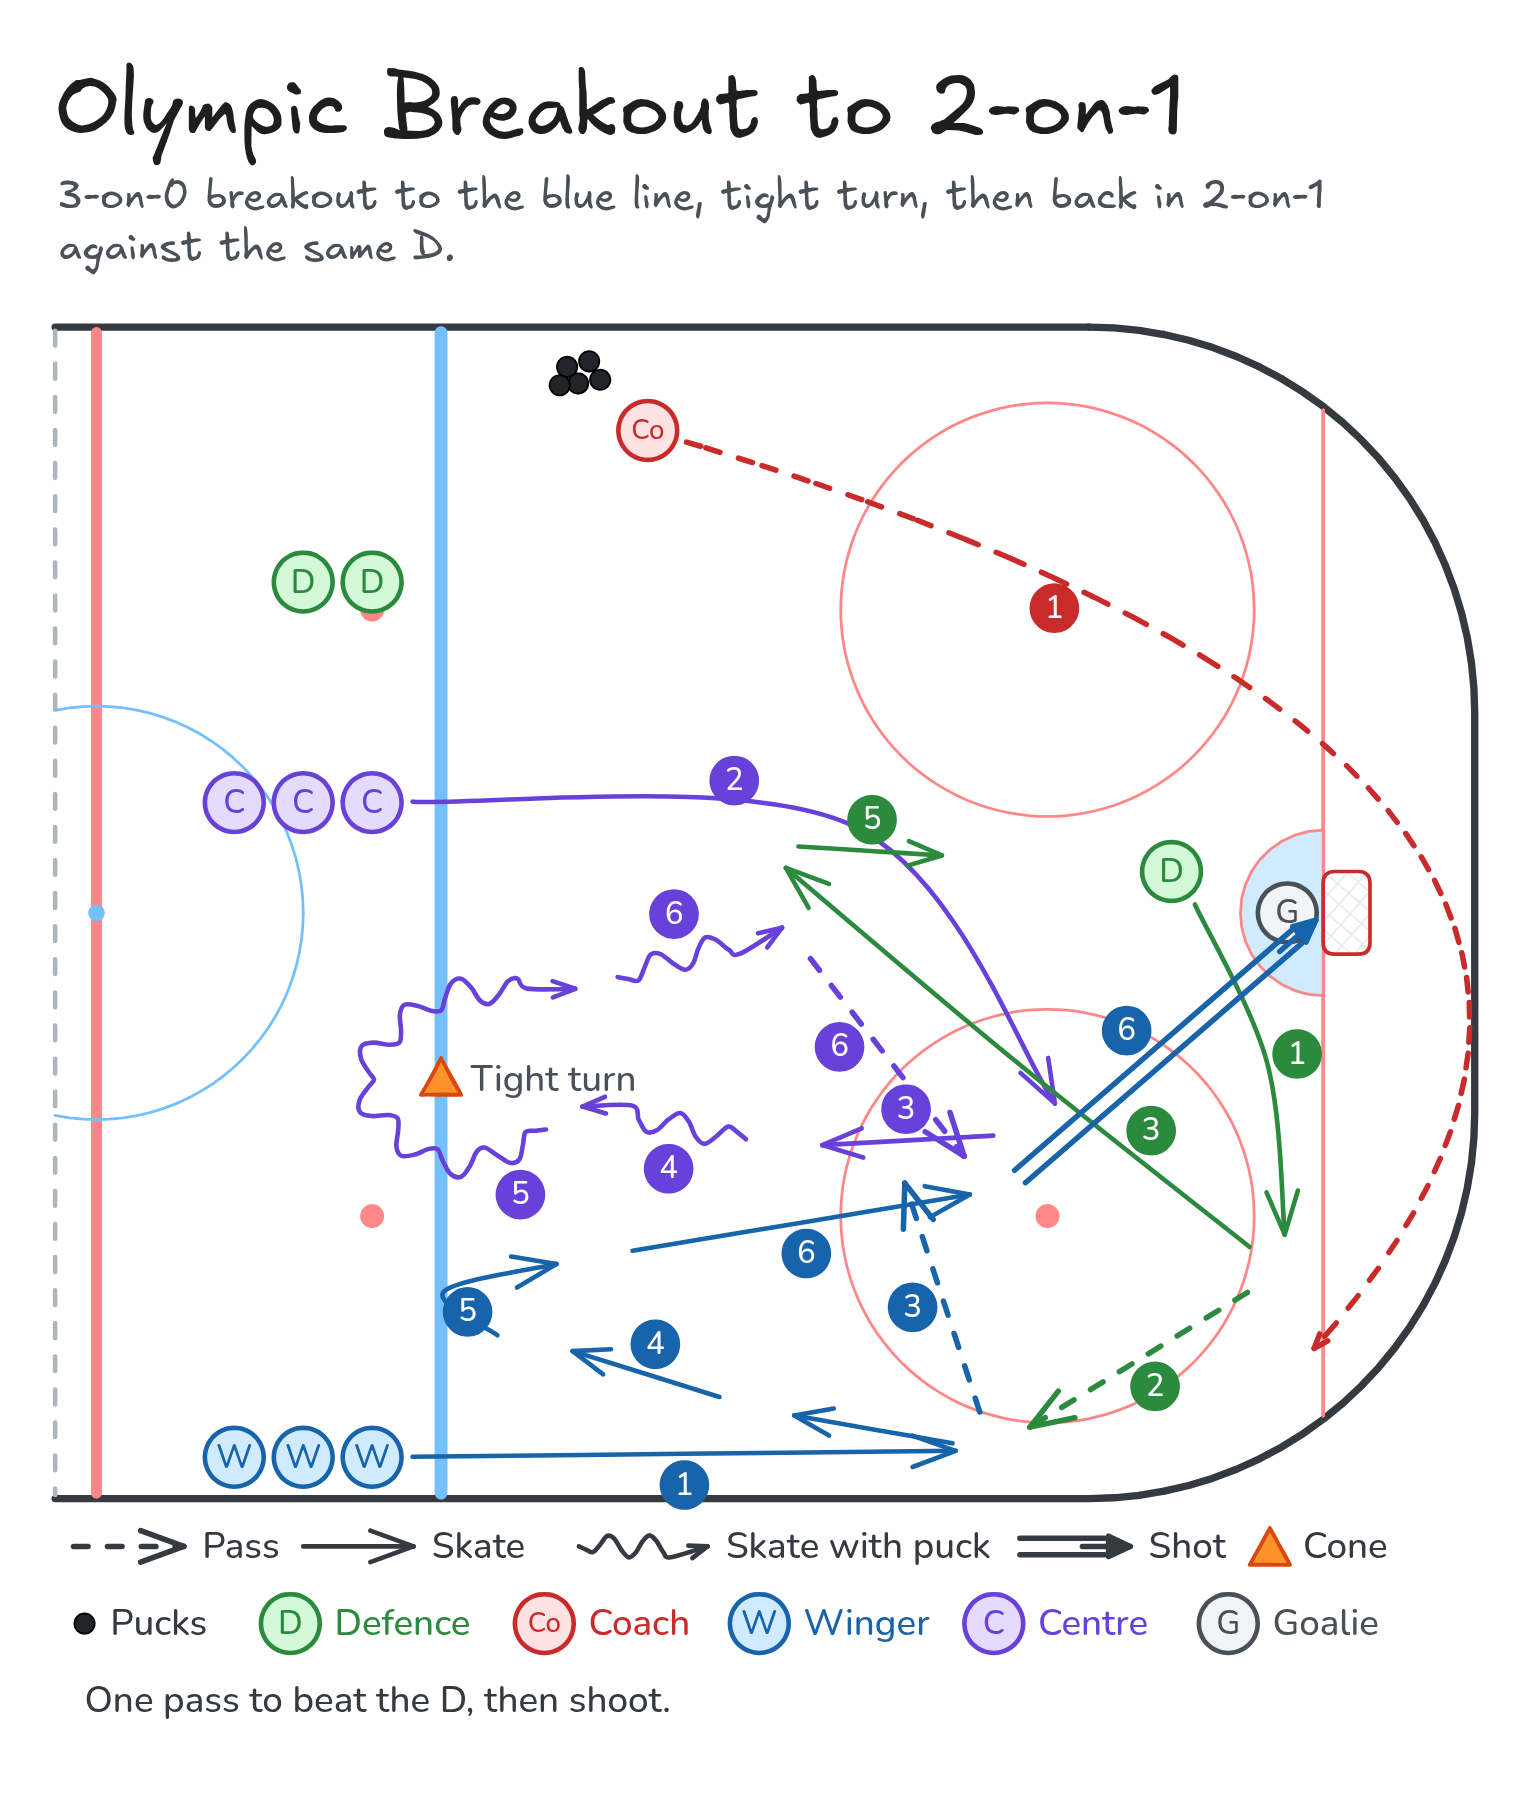
Coaching points
- D: shoulder-check on the way to the puck, then a hard, flat pass to the winger's forehand.
- Winger: back to the boards at the hash marks, stick on the ice.
- Centre: swing low and curl up the middle with speed, ready for the pass.
- Centre: go all the way around the cone, tight to it, puck on the inside, head up coming out.
- D: gap up, then pivot and skate backward. Stay in the middle and take away the pass.
- Forwards: one pass to beat the D, then shoot.
How it runs
- Setup: one D in front of the net and a cone on the blue line. Waiting lines stand in the neutral zone outside the blue line: D high, centres in the middle, wingers on the bottom boards. The coach has the pucks. Only the D, one winger and one centre go each time.
- The coach rims the puck behind the net. The D goes to get it and the winger skates down to the half-wall at the hash marks.
- The D passes to the winger on the wall while the centre swings low through the slot.
- The winger passes to the centre curling up the middle. The D gaps up toward the top of the circles.
- The centre carries the puck and the winger skates up to the blue line.
- Tight turn at the blue line: the centre loops around the cone with the puck and the winger turns on the wall side. The D pivots and skates backward.
- 2-on-1: the centre passes to the winger to beat the D, and the winger shoots.
- Everyone goes back to their line in the neutral zone and the next D steps in front of the net.
Downloads
Open the Excalidraw file in Excalidraw to change the diagram.