D-to-Wall Breakout to 2-on-1
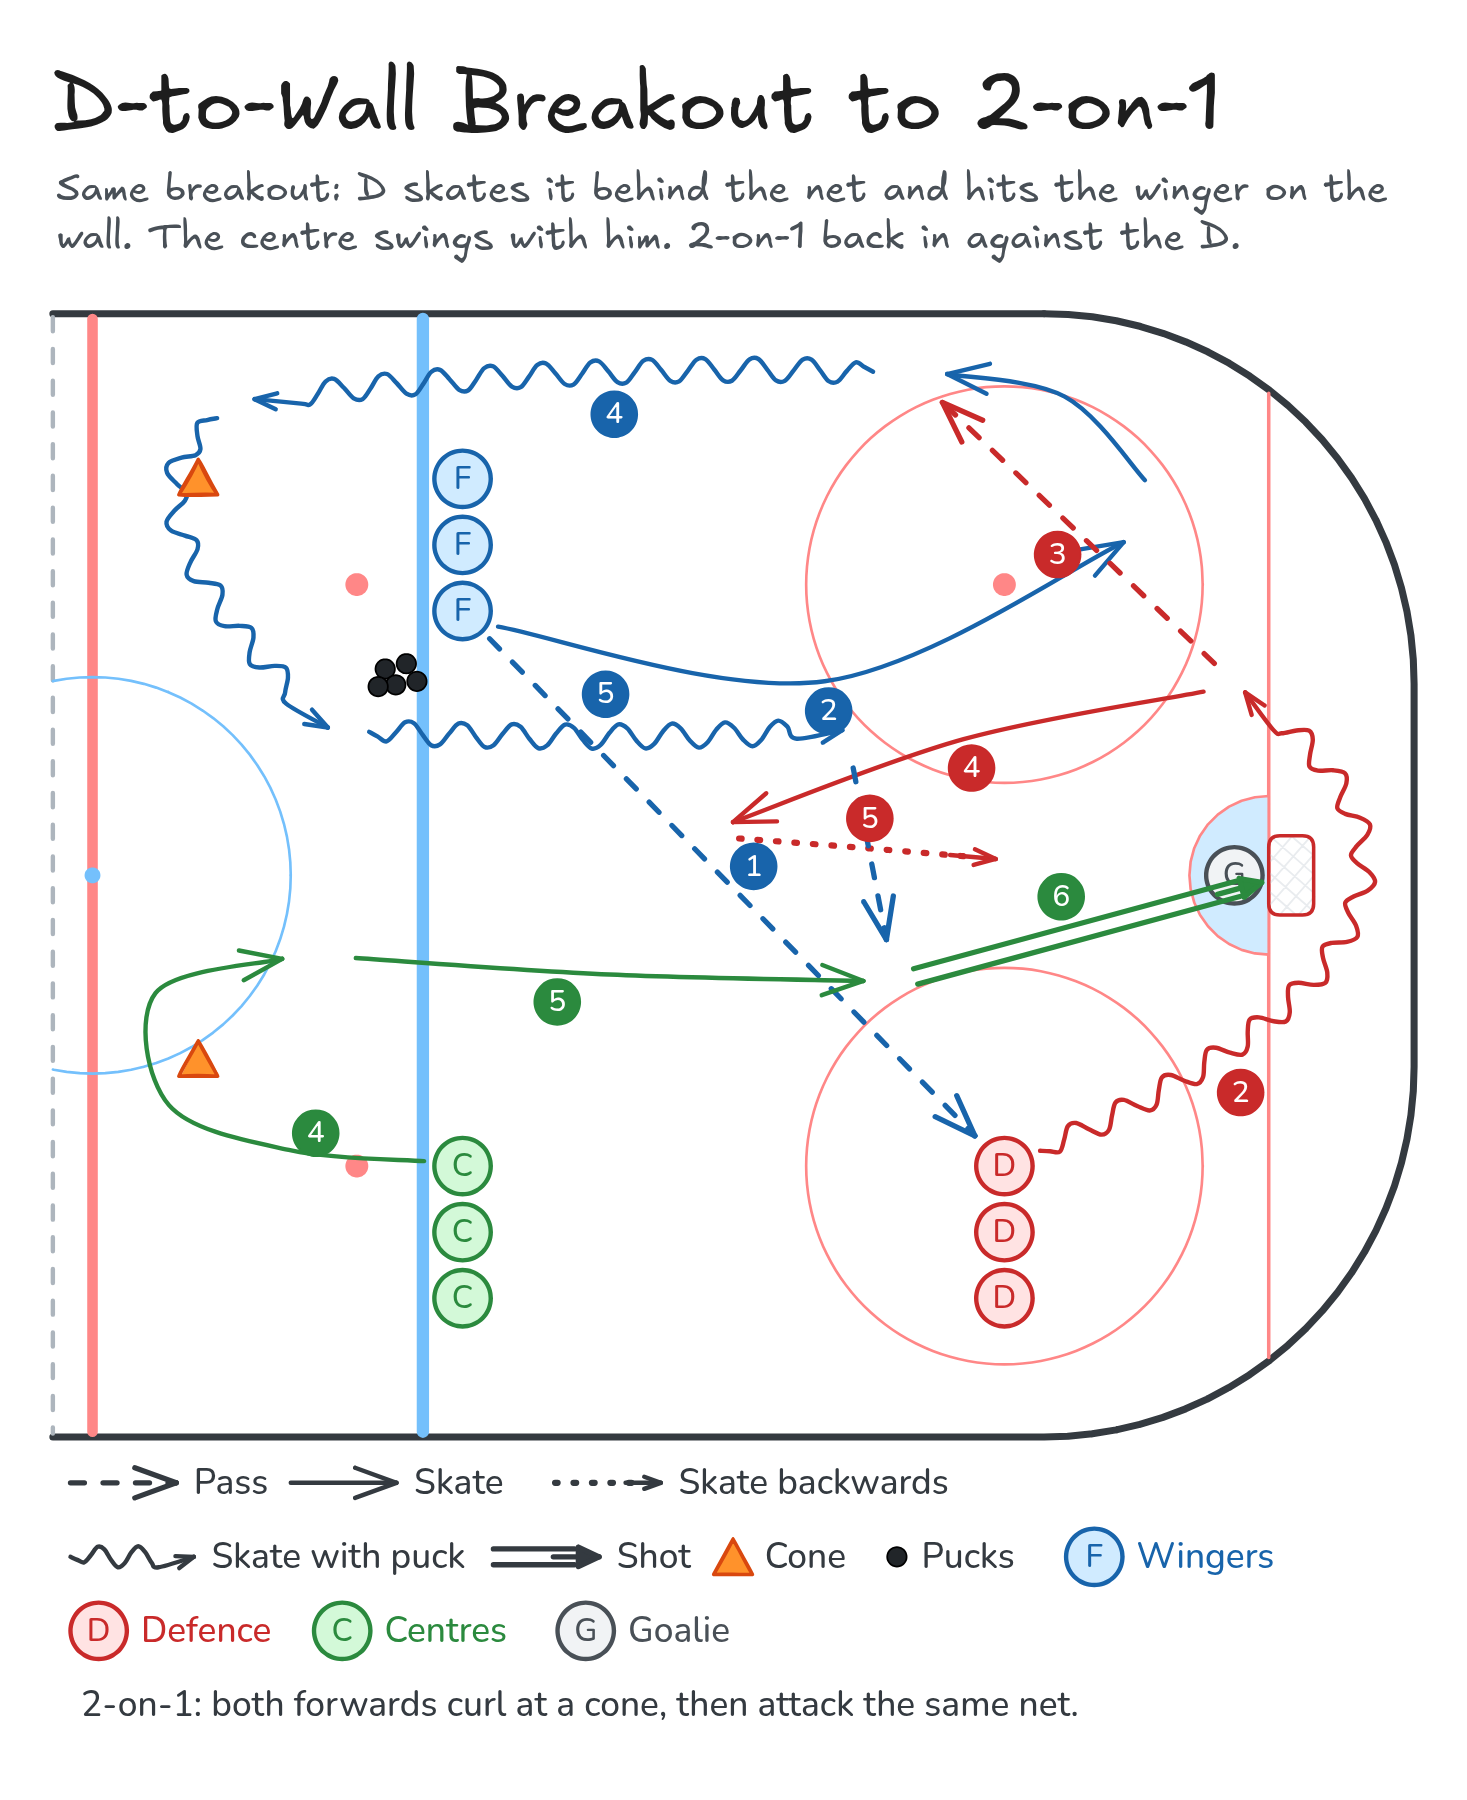
Same breakout: D skates it behind the net and hits the winger on the wall. The centre swings with him. 2-on-1 back in against the D.
- Half ice
- Breakout
- Passing
- Defence
- Shooting
Watch
Diagram
Coaching points
- Same start: winger opens up on the wall with the stick on the ice; D moves the puck quickly.
- Centre: time your swing so you curl at the cone with the winger and come in with speed.
- Attackers: stay wide apart. The puck carrier drives the net; pass only if the D takes you.
- D: step up, then skate backwards through the middle. Take away the pass and let the shooter come wide.
- Shooter: stick on the ice, ready for the pass, shoot quickly.
How it runs
- Wingers line up at the top of the blue line with pucks, centres at the bottom of the blue line. The D going steps out to the faceoff dot; the other D wait behind.
- The winger passes to the D on the dot.
- The D skates the puck behind the net. At the same time the winger loops low and opens up on the half-wall.
- The D passes to the winger on the wall.
- The winger carries up the wall while the centre swings out. Both curl at their cone near the red line. The D steps up.
- 2-on-1: the winger carries in and passes across to the centre. The D skates backwards through the middle and tries to stop the pass.
- The centre shoots. Everyone goes to the back of their own line.
- Variation: see Breakout: D to the Wall for the 1-on-1 version.
Downloads
Open the Excalidraw file in Excalidraw to change the diagram.